ชีวมวลเป็นสารอินทรีย์ที่เก็บพลังงานธรรมชาติและนำมาผลิตพลังงานได้ แต่จะไม่รวมเชื้อเพลิงฟอสซิล ส่วนใหญ่มาจากเศษวัสดุหรือกากที่เหลือจากการทำเกษตรกรรม หรืออาจมาจากการผลิตในโรงงานอุตสาหกรรม แล้วนำมาผลิตเป็นพลังงานไฟฟ้าในโรงไฟฟ้าชีวมวล

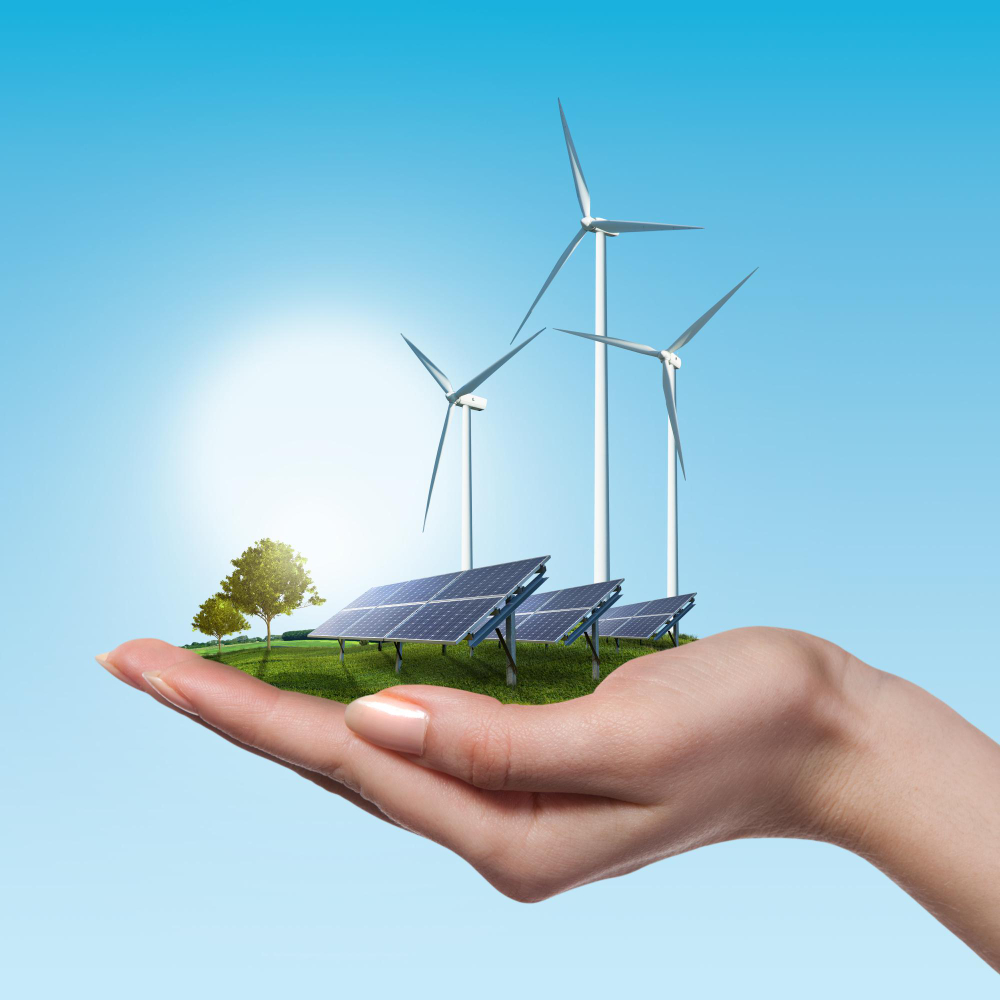
ชีวมวลเป็นสารอินทรีย์ที่เก็บพลังงานธรรมชาติและนำมาผลิตพลังงานได้ แต่จะไม่รวมเชื้อเพลิงฟอสซิล ส่วนใหญ่มาจากเศษวัสดุหรือกากที่เหลือจากการทำเกษตรกรรม หรืออาจมาจากการผลิตในโรงงานอุตสาหกรรม แล้วนำมาผลิตเป็นพลังงานไฟฟ้าในโรงไฟฟ้าชีวมวล
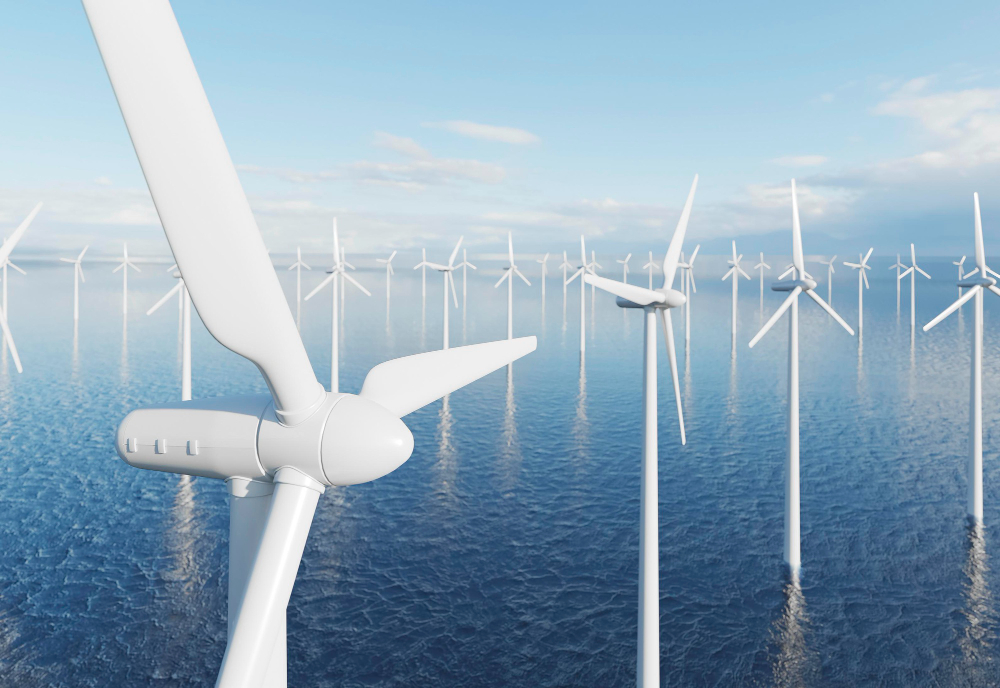
พลังงานลม พลังงานที่เกิดขึ้นตามธรรมชาติ เกิดขึ้นตามความแตกต่างของอุณหภูมิ ความกดดันอากาศ และแรงที่มีการหมุนของโลก ซึ่งล้วนเป็นปัจจัยที่จะก่อให้เกิดความเร็วกังหันลมสามารถแปรไปเป็นพลังงานรูปแบบหนึ่งได้ ซึ่งปัจจุบันมนุษย์ก็

เรามักจะได้เห็นน้องมาที่ตั้งหน้าตั้งตาใช้เท้าแสนน่ารักเกาไปตามตัวที่จุดต่างๆ ซึ่งอาการคันที่มีได้หลายสาเหตุ แต่สาเหตุหลักๆ แล้วก็คงจะเป็นสาเหตุมาจากเห็บ หมัก ศัตรูตัวร้ายของคนรักน้องหมา เพราะมันจะดูดเลือดน้องหมาของเราเป็นอาหารและนำโรคภัยไข้เจ็บมาสู่สุนัขอีกด้วย อาการก็มีตั้งแต่เป็นผื่นคันไปถึงขั้นเสียชีวิตได้เลย ซึ่งโรคของสุนัขที่เกิดจากเห็บหมัดมีหลายอย่าง ไม่ว่าจะเป็นโรคพยาธิในเม็ดเลือด ซึ่งเป็นการติดเชื้อในเม็ดเลือดแดงหรือเม็ดเลือดขาว โดยมีเห็บและหมัดเป็นพาหะ เป็นต้น วันนี้จะมาแนะนำยากำจัดเห็บหมัด เพื่อดูแลน้องหมากันเลย Nexgard Spectra for Dogs ยากำจัดเห็บ ยากำจัดหมัดสุนัขแบบเม็ด เป็นยี่ห้อที่มาจากประเทศออสเตรเลีย จึงมั่นใจเรื่องมาตรฐาณ คุณภาพ และความปลอดภัยได้อย่างแน่นอน อีกทั้งยังมียอดขายที่สูงมากกกกในโลกออนไลน์ของบ้านเราถึงระดับ 3k +++ เลยทีเดียว ก็ขายดีกันขนาดนี้
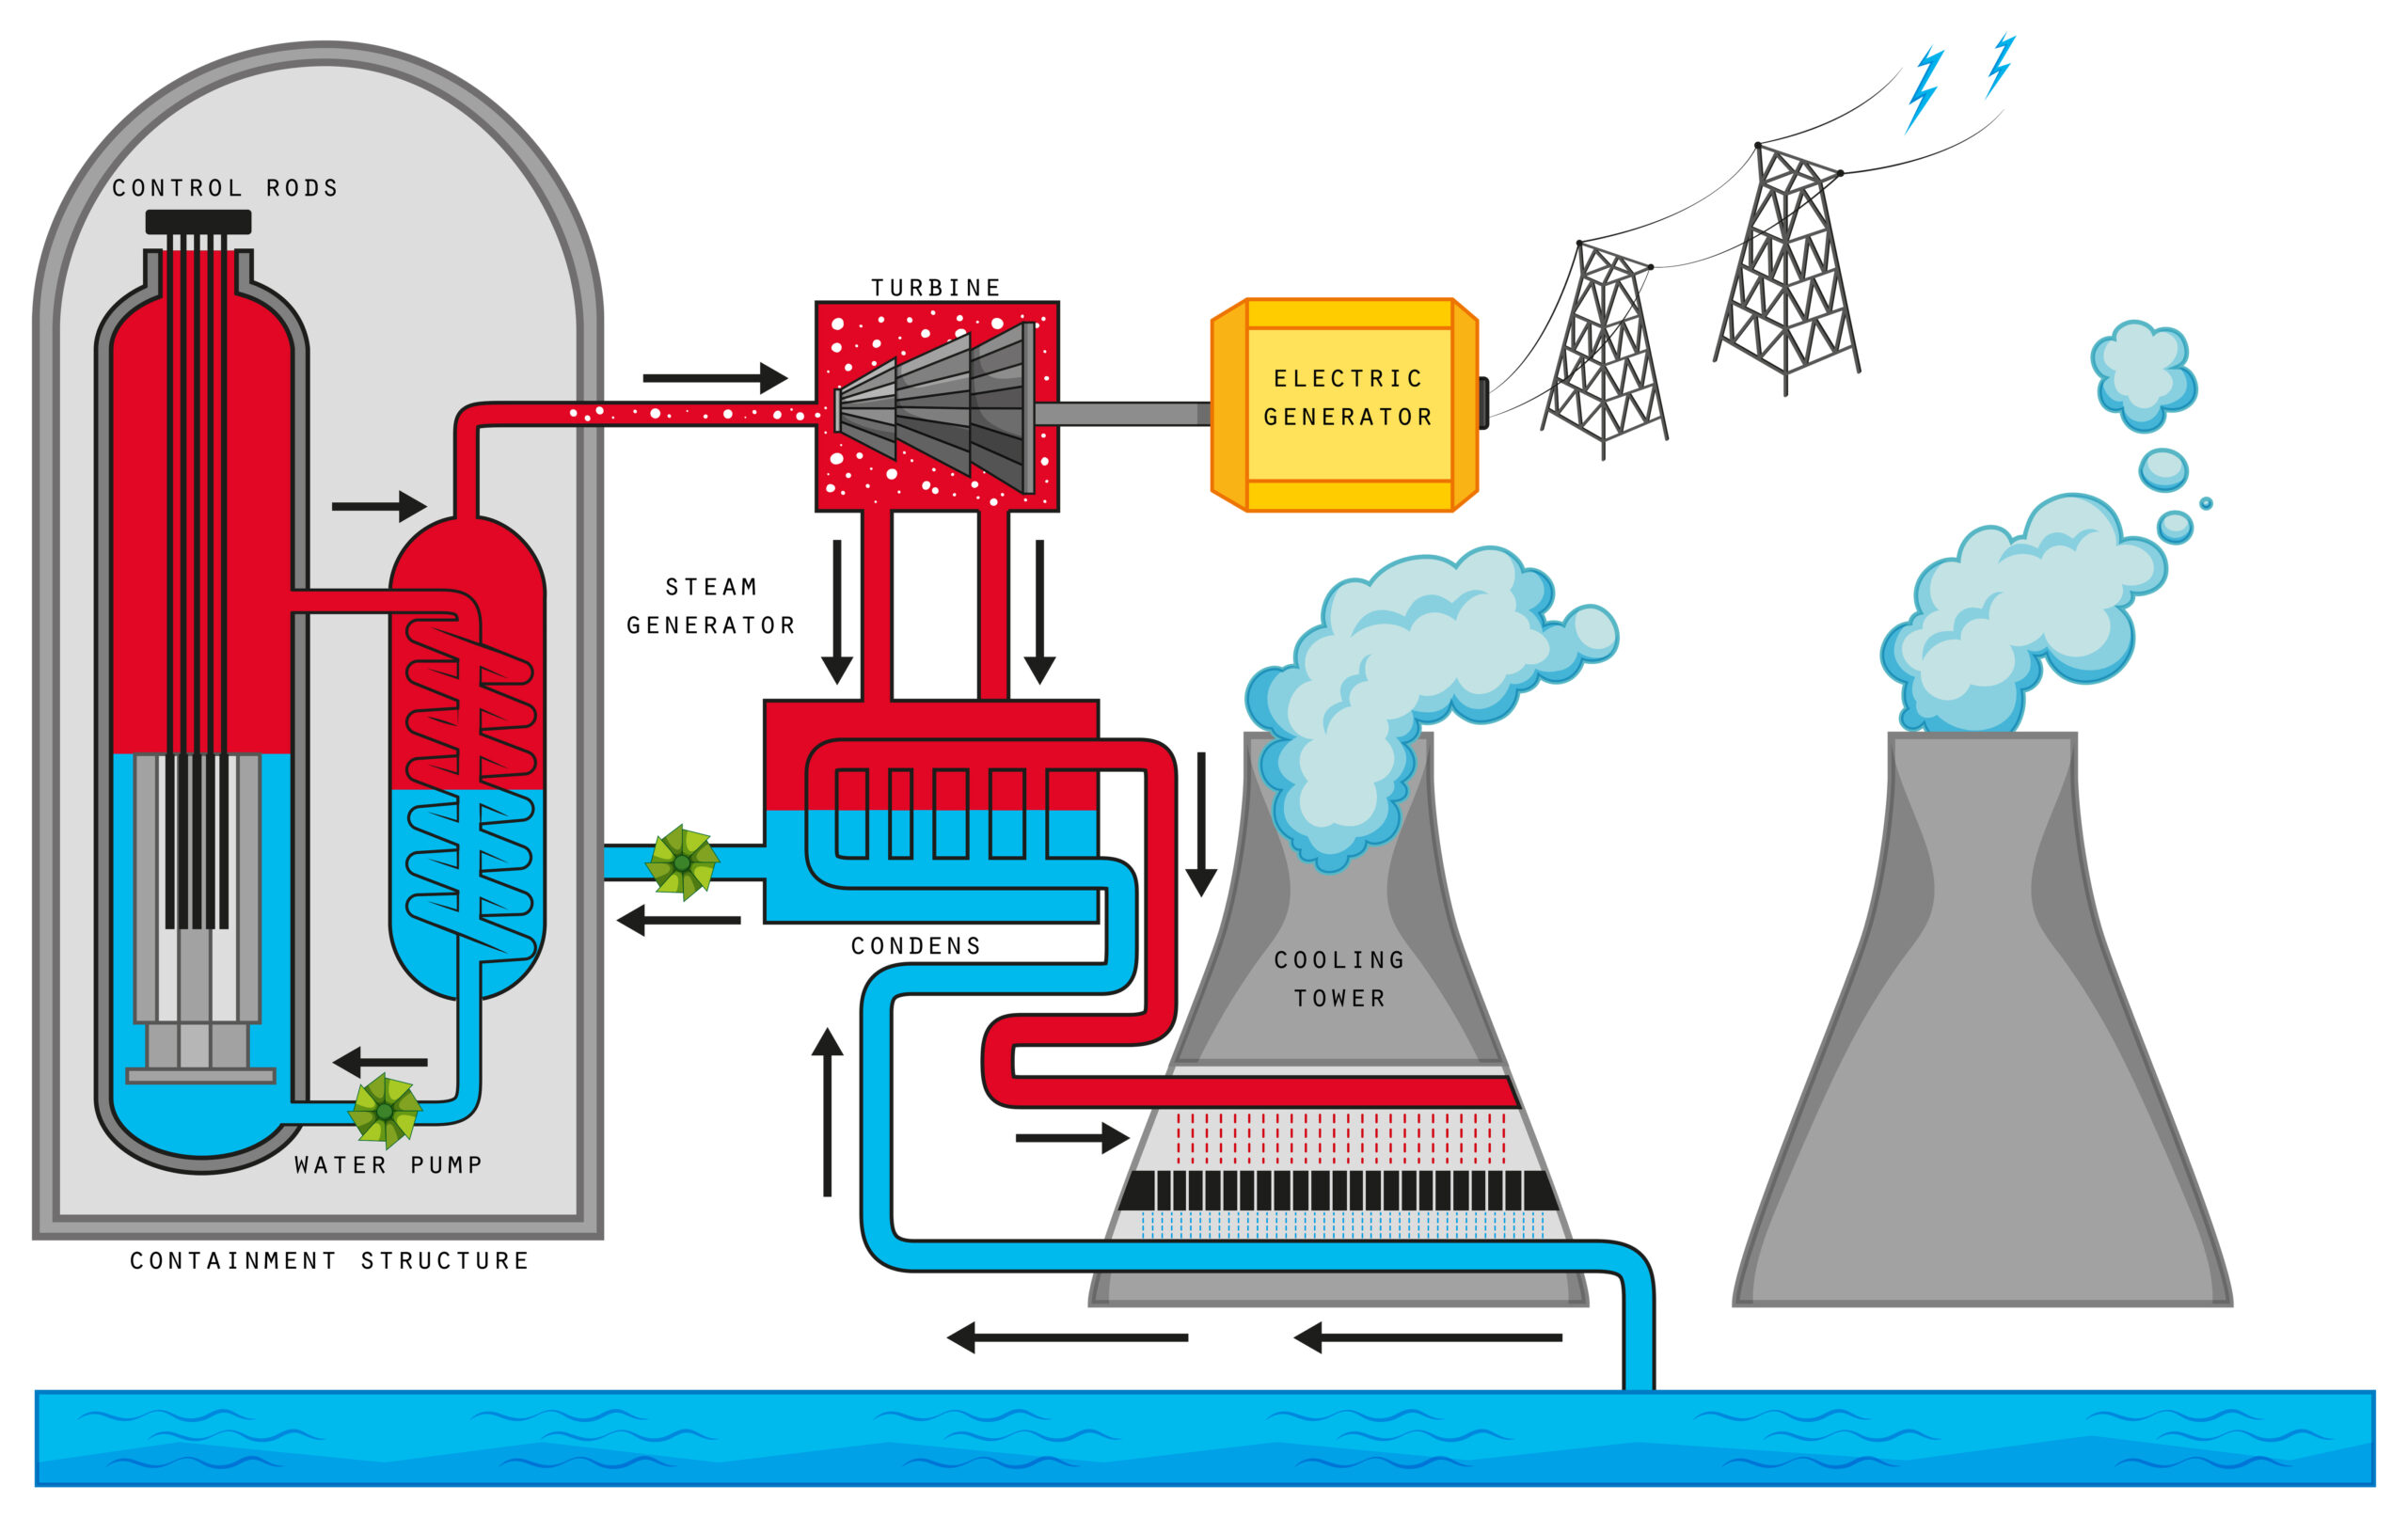
สำหรับขั้นตอนการผลิต พลังงานชีวมวล ที่มาจากโรงงานผลิตโดยตรง หลาย ๆ คน เกิดความสงสัยว่าเป็นขั้นตอนที่ทำให้เกิดมลพิษหรือไม่ ถึงแม้ว่าพลังงานเหล่านี้จะเป็นพลังงานที่นำสารอินทรีย์วัตถุที่เหลือใช้แล้วมาสร้างเป็นพลังงานก็จริง แต่กระบวนการผลิต มีความน่าเชื่อถือ และมีระบบการทำงานอย่างไร ในบทความนี้เราก็จะมาแนะนำให้คุณได้ทำความรู้จักกัน พลังงานชีวมวล ผลิตมาจากสารอินทรีย์เหลือใช้ ถึงแม้ว่าการผลิต พลังงานชีวมวล จะสามารถใช้สารอินทรีย์ที่หลากหลายนำมาผลิตได้ แต่ถึงกระนั้นสารอินทรีย์บางประเภทมีความเหมาะสมกว่า ในการแปรสภาพในการผลิตไฟฟ้าชีวมวลบางประเภท ยกตัวอย่างเช่น…วัสดุแห้ง เช่น ไม้ ซึ่งมีความเหมาะอย่างยิ่งสำหรับการนำไปเผาไหม้โดยตรง ในขณะที่วัสดุเปียก เช่น…มูลสัตว์และของเสียจากการผลิตอาหารบางชนิดเป็นแหล่งชีวมวลที่ดีกว่าสำหรับการแปลงจุลินทรีย์ให้เป็นพลังงาน โรงไฟฟ้าชีวมวล ปล่อยมลพิษหรือไม่? ขั้นตอนการแปลง พลังงานชีวมวล จะมีการปล่อยก๊าซและอนุภาคออกมา

ไมโครโฟน Polar Pattern หรือว่าการรับเสียงแบบคาร์ดิโอทั้งหมดเลยนะทั้ง 5 รุ่นการรับเสียงแบบคาร์ดิโอจะรับเสียงเฉพาะที่อยู่ด้านหน้าตรงนี้ด้านข้างหรือด้านหลังเขาจะรับเสียงเล็กน้อยมาก ฉะนั้นเวลาไปใช้งานก็ให้ร้องหรือให้พูดให้ตรงกับส่วนที่เป็นไดอะแฟรมตรงที่อยู่ด้านหน้าของไมโครโฟน เกิดว่าเราไปร้องสไตล์แบบปากไม่ตรงกับไมโครโฟน การดูดเสียงจะไม่ดีนัก และการรับเสียงแบบคาร์ดิออย มีข้อดีอย่างไร คือเสียงแบบคาร์ดิโอออยก็เหมาะสำหรับการใช้งาน เกี่ยวกับ งานพูด งานร้องตั้งแต่ในบ้านจนถึงการ Stage เวที และจะลดเสียงรบกวนนะรอบข้างได้ดี อันนี้คือจุดเด่นของคาดิออยแพทเทิร์น เราจะมาเปรียบเทียบถึงไมโครโฟน 5 รุ่น ที่มีโทนเสียงโดนใจ ราคาพอใช้ไม่เกิน 3500 บาท มีรุ่นไหน ยี่ห้ออะไรบ้าง ดังนี้ นี่ก็คือ
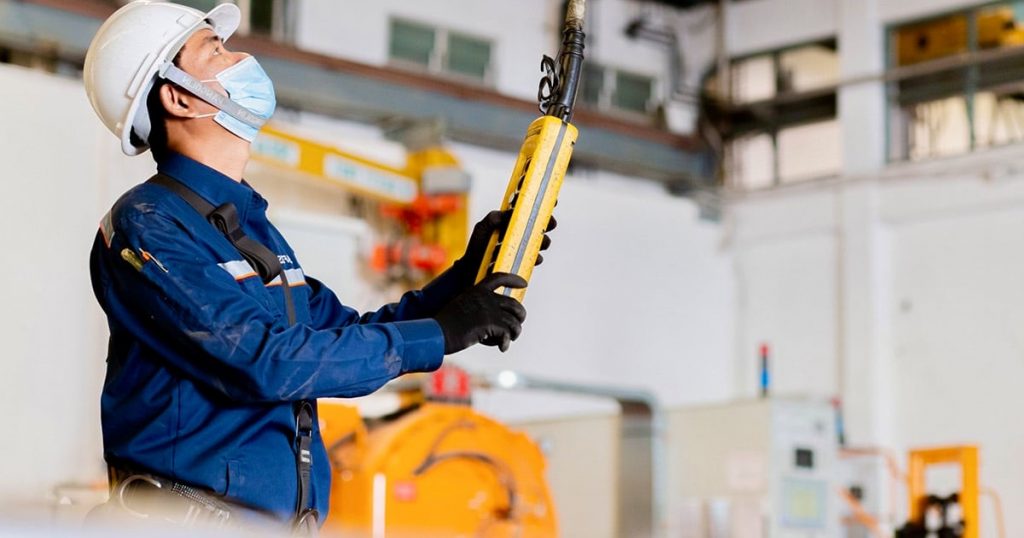
โรงงานอุตสาหกรรมต่างๆ มีการนำเครนหรือปั้นจั่นมาใช้ประโยชน์ในการทำงาน ซึ่งเป็นเหมือนเครื่องช่วยทุ่นแรงที่ดีมากๆ ลดการจ้างงานลดอุบัติเหตุจากการใช้แรงงานคนในการยกสิ่งของหนักๆ ด้วยแต่อย่างไรก็ตามแม้ว่าเครนจะเข้ามาช่วยลดอุบัติเหตุจากการทำงานด้วยมนุษย์แต่การใช้งานเครนก็อาจสร้างอุบัติเหตุที่ร้ายแรงได้ วันนี้เราจะพามาดูกันว่าเครนโรงงานมีส่วนประกอบใดสำคัญบ้างและการอบรมเครนสำคัญหรือไม่ ส่วนประกอบของเครนโรงงาน 1.ตัวขับเคลื่อนแนวยาว อุปกรณ์ขับเคลื่อนตามแนวยาวหรือชุดขับเคลื่อนแนวยาวคือชุดที่ประกอบติดกับคานเครนโรงงาน โดยมีมอเตอร์ไฟฟ้าช่วยขับเคลื่อน และจะต้องใช้คอนโทรลไฟฟ้าในการควบคุมการเคลื่อนที่ ขาเครนโรงงานต้องรับน้ำหนักไว้ทั้งหมด เพื่อให้ส่งของได้ผ่านล้อ นอกจากนั้นขาของเครนโรงงานยังเป็นตัวที่ช่วยกระจายน้ำหนักยกจากรอกสู่รางวิ่งโดยยึดติดกับเสาอาคารของโครงสร้าง 2.รอกไฟฟ้า สำหรับรอกไฟฟ้าจะเป็นตัวช่วยในการผ่อนแรงเพื่อยกสิ่งของที่มีน้ำหนักมากในทิศทางขึ้นลงรวมถึงซ้ายขวา โดยมีชุดเพลามอเตอร์ในการส่งกำลังไปยังชุดเกียร์สามารถเพิ่มแรงบิดไปยังแกนม้วน ช่วยเพิ่มกำลังในการยกสิ่งของที่มีน้ำหนักมากโดยมีคานล้อเป็นชุดล้อวิ่งตามเครนโรงงานที่ได้ติดตั้งไว้ 3.อุปกรณ์ไฟฟ้าแนวขวาง อุปกรณ์ไฟฟ้าตามแนวขวางอุปกรณ์นี้ใช้ติดตั้งแขวนสายไฟแนวขวางทำให้สามารถติดตั้งบนชุดคานเครนโรงงานได้และสามารถจ่ายไฟฟ้ารวมถึงคอนโทรลการทำงานรอกไฟฟ้าให้ยกสิ่งของขึ้นลงหรือซ้ายขวาได้ตามแนวคานเครน ทำให้วิ่งเครนได้อย่างปลอดภัยมากขึ้น จากนั้นส่วนประกอบของเครนโรงงานยังมีทางวิ่งและรางวิ่งเครน รวมถึงอุปกรณ์เสริมเพื่อความปลอดภัยต่างๆ เมื่อพูดถึงความปลอดภัยในการใช้งานเครนโรงงาน การป้องกันความปลอดภัยที่ดีที่สุดคือการให้ผู้ที่ปฏิบัติงานหรือผู้ที่มีส่วนเกี่ยวข้องได้เข้ารับการอบรมเครน เนื่องจากการอบรมเครนเป็นการปูความรู้พื้นฐานตั้งแต่ต้นไปจนถึงสามารถปฏิบัติงานได้อย่างมืออาชีพและปลอดภัย การอบรมเครนเป็นหลักสูตรที่สำคัญมากๆ นายจ้างสามารถส่งลูกจ้างเข้ารับการอบรมเครนได้กับศูนย์ฝึกอบรมที่ได้รับอนุญาตอย่างเป็นทางการจากกรมสวัสดิการและคุ้มครองแรงงานและรับมาตรฐาน ISO 9001
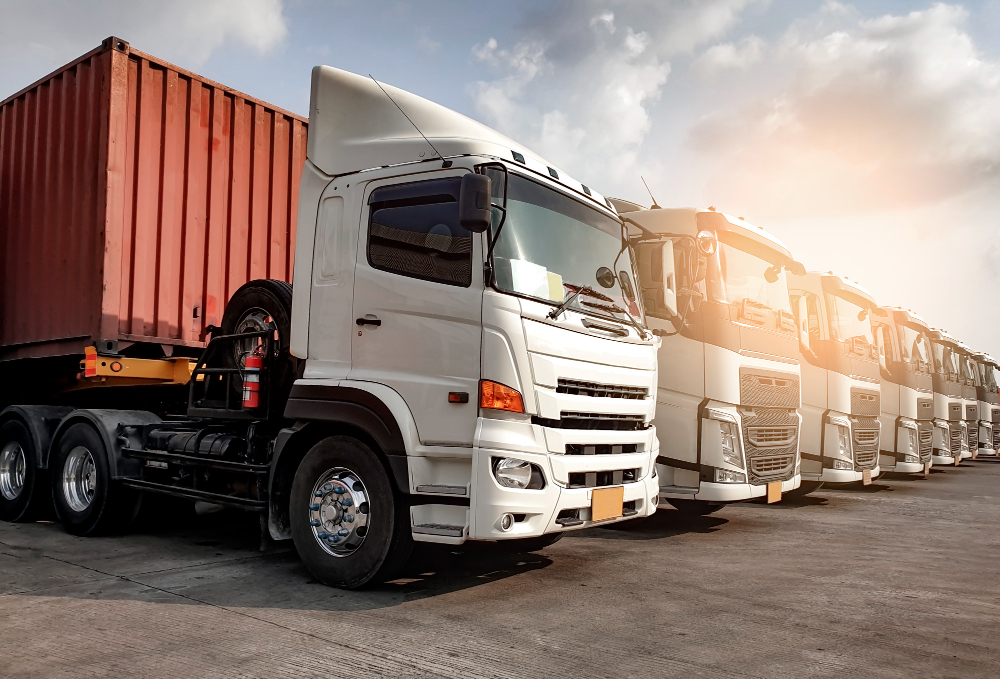
สำหรับใครที่สนใจอยากใช้บริการรถรับจ้างเพชรเกษม ใช่ว่าจะเลือกผู้ให้บริการใดก็ได้ เพราะถึงแม้ช่องทางการติดต่อในปัจจุบันมีความสะดวกสบาย เพียงแค่ค้นหาบนเว็บก็มีรายชื่อของบริษัทรถรับจ้างขนส่งให้คุณได้เลือก โดยมีการนำเสนอสิทธิประโยชน์ที่แตกต่างกันไป บางที่โดดเด่นเรื่องราคา บางทีโดดเด่นเรื่องคุณภาพ ดังนั้นคุณจึงจำเป็นต้องใส่ใจเรื่องการตรวจสอบให้ดีก่อนเลือกใช้บริการ สิ่งที่ควรตรวจสอบก่อนเลือกใช้บริการรถรับจ้างเพชรเกษม แน่นอนว่าทุกคนย่อมรู้ดีอยู่แล้วว่ารถรับจ้างเพชรเกษมนั้นมีข้อดียังไงและสะดวกสบายแค่ไหน แต่ก็ไม่ได้หมายความว่าทุกบริษัทจะเป็นเช่นนั้น หากคนที่เคยใช้บริการมาก่อนก็ไม่จำเป็นต้องทำการตรวจสอบข้อมูลอะไรให้ยุ่งยาก แต่สำหรับใครที่เป็นมือใหม่และเพิ่งหาข้อมูลในเรื่องนี้ จำเป็นอย่างมากที่ต้องตรวจสอบ 1. ให้คำแนะนำเรื่องประเภทรถรับจ้างที่เหมาะสม แน่นอนว่าคุณไม่เคยใช้บริการรถขนส่งมาก่อน ดังนั้นจึงไม่มีข้อมูลในเรื่องของขนาดและราคาที่ต้องจ่ายให้กับบริษัทขนส่ง ทางบริษัทจึงจำเป็นต้องมีการให้คำแนะนำประเภทรถว่าแบบไหนเหมาะสำหรับการขนของแบบใด เช่น รถกระบะ เหมาะสำหรับการเคลื่อนย้ายตู้เย็น รถมอเตอร์ไซค์ ที่นอน เตียง ตู้ เป็นต้น 2. สามารถประเมินราคาก่อนได้ ก่อนจะตัดสินใจใช้บริการรถรับจ้างเพชรเกษม

เหตุผลแรกที่คุณควรซื้อขายกระเป๋าแบรนด์เนมมือสองนั่นก็เป็นเพราะว่ามีราคาที่ต่ำกว่ากระเป๋าแบรนด์เนมมือหนึ่ง แต่ยังคงคุณภาพของกระเป๋าแบรนด์เนมเอาไว้ได้อย่างครบถ้วน ซึ่งถ้าหากว่าคุณมีงบในการซื้ออย่างจำกัด การซื้อกระเป๋าแบรนด์เนมมือสองนับว่าเป็นทางเลือกที่น่าสนใจ เพราะการซื้อกระเป๋าแบรนด์เนมจากในช็อปนั้น อาจหมายถึงการที่คุณต้องทุ่มเงินจำนวนมากเพื่อที่จะได้ครอบครองกระเป๋าเพียงหนึ่งใบ แต่ในทางกลับกัน กระเป๋ามือสองก็เป็นของแท้และมีดีไซน์การออกแบบที่เหมือนกับมือหนึ่งทุกอย่าง มีงานวิจัยพบว่าผู้คนส่วนใหญ่นิยมซื้อสินค้าแบรนด์เนมด้วยเหตุผลหลักๆคือ ความคุ้มค่า นอกจากนั้นยังมีมากมายหลากหลายรุ่น หลากหลายปี หรือแม้กระทั่งในรุ่นที่เลิกผลิตไปแล้วก็ยังมีเช่นกัน ส่วนราคาขะเป็นอย่างไรนั้น ขึ้นอยู่กับสภาพการใช้งาน นอกจากนั้นราคาของสินค้ามือสองโดยส่วนใหญ่ จะมีราคาที่ถูกกว่าสินค้ามือหนึ่งถึง 30% นั่นจึงเป็นเหตุผลว่าทำไม ร้านรับซื้อกระเป๋ามือสอง จึงได้รับความนิยมอย่างมากในปัจจุบัน เพราะการซื้อขายสินค้าแบรนด์เนม เปรียบเสมือนการเปิดโอกาสให้กับกลุ่มคนที่ต้องการใช้สินค้าแบรนด์เนม แต่มีกำลังทรัพย์ที่ค่อนข้างจำกัด นอกจากนั้นสินค้าแบรนด์เนมมือสองยังเหมาะกับผู้ที่มีกระเป๋าแบรนด์เนมเยอะเกินความจำเป็ร และต้องการปล่อยสู่ท้องตลาดเพื่อทำกำลัง แลกเปลี่ยนนำสินค้าใหม่ๆไปใช้ คุณประโยชน์ของกระเป๋าแบรนด์เนมมือสอง ในช่วงหลายปีที่ผ่านมานั้น ตลาดกระเป๋าแบรนด์เนมมือสอง
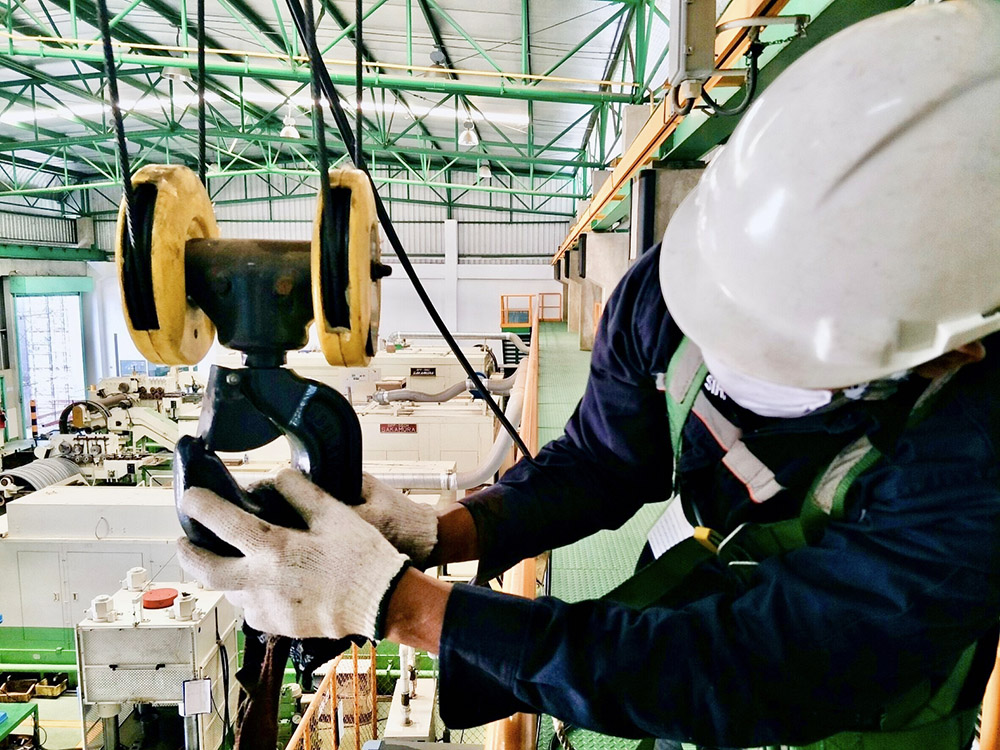
ปั่นจั่นนั้นเป็นอีกหนึ่งในเครื่องทุ่นแรงที่สำคัญอย่างมาก และ ที่สำคัญนั้นปั่นจั่นนั้นจะต้องมีมาตรฐานที่ดีอย่างมากด้วยเช่นกันนั้นจึงทำให้การเลือกใช้ปั่นจั่นนั้นมีความสำคัญอย่างมากด้วยเช่นกัน และ ในการเลือกใช้ปั่นจั่นไม่ใช่แค่ปั่นจั่นนั้นจะต้องมีมาตรฐานยังมีปัจจัยอื่น ๆ ที่เกี่ยวข้องด้วยเช่นกันไม่ว่าจะเป็นคนขับ พื้นที่ในการติดตั้ง ดังนั้นในบทความนี้เราจะมาดูในเรื่องของความปลอดภัยของปั่นจั่นกันดีกว่านะครับว่ามีเรื่องอะไรบ้าง พื้นที่การติดตั้งที่ไม่มีมาตรฐาน ในกรณที่พื้นที่การติดตั้งนั้นไม่มีมาตรฐานนั้นจะเกิดอันตายอย่างมากเพราะว่า อาจจะทำให้ปั่นจั่นนั้นล้มลงมาสร้างความเสียหายได้โดยนอกจากจะสร้างความเสียหายในพื้นที่แล้ว ยังมีในส่วนของความเสียหายต่อบุคลที่อายจจะถึงชีวิตเลยก็ว่าได้ด้วยเช่นกัน ดังนั้นในเรื่องของพื้นที่การติดตั้งนั้นมีความสำคัญอย่างมากที่เรานั้นไม่ควรที่จะมองข้ามด้วยเช่นกัน การยกน้ำหนัก มีหลากหลายครั้งที่มีอุบัติเหตุที่เกิดจากการพยายาย้ำน้ำหนักที่หลากหลายมากเกินไป หรือ พยายามที่จะยกน้ำหนักที่มีขนาดมากกว่าน้ำหนักที่ตัวเองรับไหว ซึ่งส่งผลให้สลิงขาดและน้ำหนักที่ยกลงก็ตก ซึ่งแน่นอนว่าเป็นอันตรายอย่างมากในพื้นที่โดยรอบ และ นี้เป็นเรื่องที่เกิดขึ้นจริงมาด้วยเช่นกันดังนั้นในเรื่องของ”การยกน้ำหนัก” นั้นการตรวจสอบโดยการตรวจ ปจ.2 นั้นมีความสำคัญอย่างมากเพื่อที่เราจะได้รู้ว่าข้อจำกัดในการยกน้ำหนักของปั่นจั่น เพื่อที่จะได้ใช้งานได้ถูกต้อง และ ป้องกันไม่ให้เกิดข้อผิดพลาดในการยกน้ำหนักของปั่นจั่น
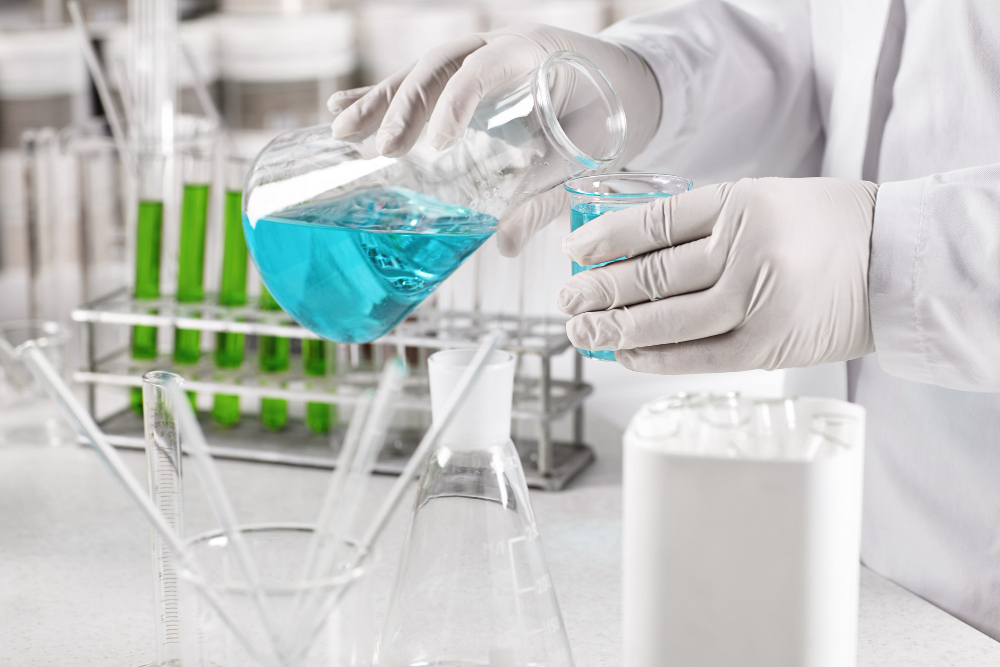
บริษัทนำเข้าสารเคมีจัดเป็นหนึ่งในธุรกิจที่สามารถสร้างผลกำไรได้อย่างมหาศาล ที่สามารถให้คำปรึกษาและตอบคำถามข้อสงสัยต่าง ๆ ในอุตสาหกรรมที่ต้องมีการใช้สารเคมีในการทำปฏิกิริยาต่าง ๆ เพื่อให้ได้ผลิตภัณฑ์สักหนึ่งชิ้น จำเป็นที่จะต้องมีความรู้และความเข้าใจในการเลือกใช้และเลือกซื้อสารเคมีด้วยกันทั้งสิ้น เนื่องจากบริษัทที่ผลิตสิ่งของสักหนึ่งชิ้นนั้นไม่ได้มีพื้นที่มากพอที่จะสร้างสารเคมีเพื่อที่จะนำมาใช้ในอุตสาหกรรมของตนเองได้ เนื่องจากข้อกำหนดและกฎเกณฑ์ต่าง ๆ ในการสร้างโรงงานผลิตสารเคมีนั้นมีความซับซ้อนและยุ่งยากกว่าโรงงานอุตสาหกรรมประเภทอื่น ๆ เป็นอย่างมาก ยกตัวอย่างในการสร้างโรงงานเคมีนั้นจะต้องมีพื้นที่มากเพียงพอที่จะให้สามารถสร้างอากาศที่หมุนเวียนภายในบริษัทได้ เพื่อความปลอดภัยของพนักงานที่ทำงานในบริษัท อีกทั้งพื้นที่และระบบรักษาความปลอดภัยภายในโกดังเก็บสินค้าที่เป็นสารเคมีนั้นจะต้องมีมาตรฐานและการดูแลจัดการที่ดีเยี่ยม ที่สำคัญจะต้องมีที่ตั้งห่างไกลจากเขตชุมชน เนื่องจากเป็นการป้องกันอันตรายการการระเหยหรือแรงระเบิดจากสารเคมีที่มีความอันตรายต่อสิ่งมีชีวิตนั่นเอง ความสำคัญของบริษัทนำเข้าสารเคมี บริษัทนำเข้าสารเคมีนี้ก็เป็นส่วนหนึ่งที่นำเข้าและรวบรวมสารเคมีต่าง ๆ ไว้อย่างมากมาย และมีทีมงานที่คอย Support ปัญหาและคำถามต่าง ๆ ของลูกค้าเพื่อให้ได้คำตอบที่ถูกต้อง อีกทั้งยังต้องมีระบบการดูแลสินค้าที่เป็นสารเคมีได้อย่างดีเยี่ยม มีมาตรการรักษาความปลอดภัยและวิธีการปฏิบัติตัวในยามที่เกิดวิกฤตได้เป็นอย่างดี อีกทั้งยังสามารถส่งออกและนำเข้าสารเคมีต่าง ๆ ได้